Asus Repeater Login | http://repeater.asus.com
Http://repeater.asus.com redirects the user to the Asus Extender login GUI Interface. To access any Asus Repeater Login Configuration webpage users can use web address http://repeater.asus.com
Turn on your Asus extender and connect an Ethernet cable between the computer and Asus extender. Open a web browser and IP address 192.168.1.1 in the address bar of your browser follow onscreen instructions and complete setup procedure for Asus extender.
HTTP://REPEATER.ASUS.COM | REPEATER.ASUS.COM LOGIN
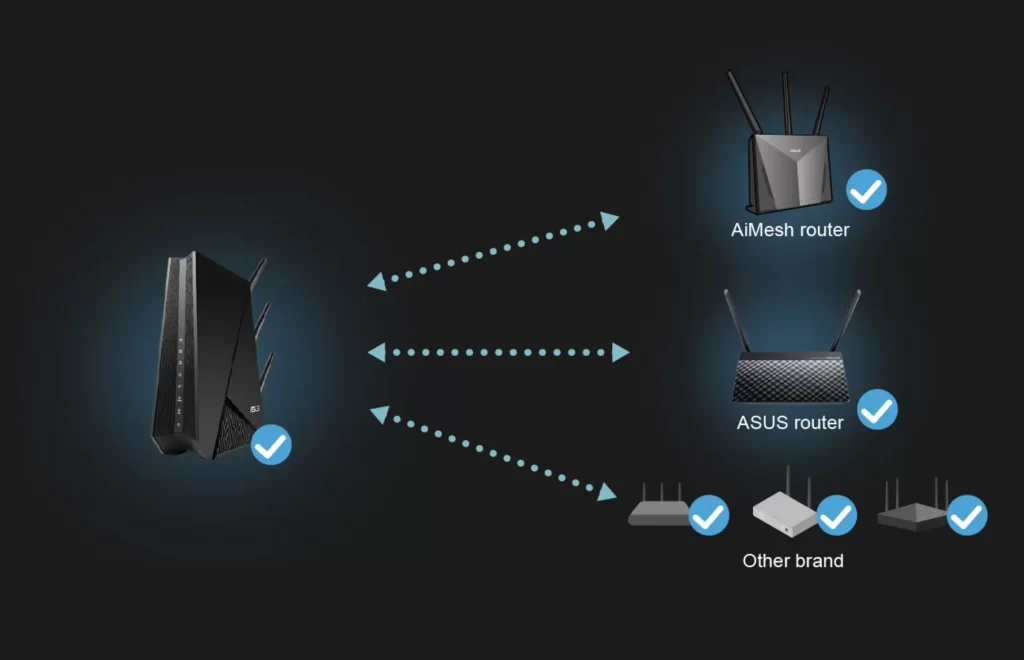
Simply launch a web browser and type repeater.asus.com in the address bar of your browser which redirects you to an IP address 192.168.1.1. To access Asus repeater login webpage, connect your device with Asus extender wired or wirelessly. After this a login screen will appear, use the username as admin and password also as admin. These days, Asus repeaters are best known for their ultimate coverage and performance to cover dead zone areas of your home location. Asus repeaters are compatible with almost all kinds of routers and access points. Asus extenders can be configured easily using WPS set up or manually using a wired connection.
ASUS EXTENDER SETUP
STEP1: Turn on your Asus extender, plug in the Asus extender to the power outlet and wait for the lights to turn solid white/ green on Asus extender.
STEP2: Press and hold WPS button on Asus extender for 3 seconds. Asus extender lights will start flashing then press and hold WPS button on the main router and wait for 2 minutes.
STEP3: Place Asus extender in between dead zone area and your main router. You can customize Asus extender settings using Asus extender application or by simply logging to Asus extender webpage using web address http://repeater.asus.com or IP address 192.168.1.1.

Repeater.asus.com is not accessible
http://repeater.asus.com is the default web address to access the login page of the Asus extender to open the web-based user interface. The web interface is used to configure the extender. When you encounter an error message while accessing this web address, then there is definitely a reason for this issue. The issue can be resolved by checking some of the points given here.
- Try to access the login page using the default IP address for an Asus extender.
- You can find at the product label or quick installation guide for your Range extender.
- Clear the cache of the browser or try from a different browser.
- Reboot your Extender.
- Reset your extender to factory default settings and try again.
- Try from a different computer or laptop.
- Connect through a wired connection to your Asus Extender.
- A wired connection can be made using Ethernet cable.
- Unplug the extender and all other cables and connect again.
ASUS EXTENDER LOGIN
Asus Repeater Login via http://repeater.asus.com
To log in to the web-based interface of an Asus Wi-Fi range extender, such as the RP-AX56, follow these steps:
- Connect a device (such as a computer or smartphone) to the range extender using Wi-Fi or an Ethernet cable.
- Open a web browser on the connected device and enter “repeater.asus.com” in the address bar. This will open the range extender’s login page.
- Enter the default username and password for the range extender. The default login credentials may vary depending on the model and firmware version of the range extender. Some common default login credentials include:
- admin/admin
- admin/password
- user/user
- If you have changed the default login credentials, enter the new username and password that you set.
- Click “Log In” to access the range extender’s web-based interface. From here, you can manage the range extender, including changing settings and checking the status of the device.
If you have forgotten the login credentials for your range extender, you may need to reset the device to its default settings to regain access. To do this, you will need to locate the reset button on the range extender and press it for a few seconds. This will reset the device to its default settings, including the default login credentials.
Know about your Asus extender
Extenders are used when your router is not able to provide you the internet in all corners of your home wirelessly. Asus extenders are one of the widely used extenders these days as they provide sufficient coverage and speed to the user. An extender takes the signal from your router and rebroadcasts it to the areas where there is no signal. These areas are called dead zones. The extender should be placed between dead zones and your router. Make sure the extender is getting a proper signal from your router to transfer it further. If not then place your extender closer to the router. The placement matters a lot, so make a good one.
After purchasing an extender, the users get stuck at the installation as all the users do not know how to install an extender. Even after successful installation, a user gets issues from time to time in his extender such as unable to login to the extender home page. To resolve such kind of issues or to help the users in the installation of Asus extender through a default web address or IP address, we have a dedicated team of experts. Get a solution for every problem related to Asus extender RP-68u.
How to have the same name for Asus extender and router?
When you setup an Asus extender, it will have a different network name than your router to avoid confusion while you roam from one corner to another. But some users want the same name for both of these. The configuration panel of an Asus extender allows you to do so. Follow the steps given below.
- Connect a computer to the network name or SSID of your Asus Extender.
- Open a web browser from this computer such as Microsoft Internet Explorer.
- In the address bar of this browser, type default web address for Asus extender login http://repeater.asus.com to access the extender configuration page.
- A login page opens. Enter the username and password in the given fields as admin.
- Go to the network map page, then select band and update new SSID (network name) for your Asus extender.
- Enter a new security code in the specified field. Click on apply to make changes.
- After following these steps, you will have a different name for your extender network.
- To change the name of another band, follow these steps again. For any query, get a quote from us.
Getting intermittent connection in the smartphones or tablets
If this is the issue you are facing then this is because the internet connection is bouncing from a network to another. The bouncing back and forth between the networks can cause this type of issue. Your device is not able to properly select the network to connect. Make sure your device is within the range of your extender network or router network to get proper internet. Both networks may cause interference with each other if there is more than one network available. Make sure your Asus extender is not stacked up, you can change channels on Asus extender to avoid signal interference. To update Asus extender channel settings, simply login to the Asus extender login webpage using web address http://repeater.asus.com. Click on the wireless option and change channels to 11 or 6, then click on apply and save option.
Graphical User Interface to install Asus RP-N53 extender
- Connect to the wireless network of your extender.
- Either connects to 2.4 GHz network or 5 GHz network.
- It is a dual band extender that is why you will see two SSIDs.
- To access the Asus range extender, open a web browser and type http://repeater.asus.com in the URL bar of the browser.
- A login page prompts after you hit enter from the keyboard. Enter default username and password in the respective fields.
- Follow the steps thereafter. Select your router network that you want to extend and enter its security key.•
- Create a name for the new extender network and connect devices placed at dead zones to this extender network.
Using Wi-Fi Protected Setup
- This is considered the easiest method to setup an extender.
- If your router supports WPS then we recommend to setup through this method rather than the manual one.
- You may get issues while following the setup of manual setup.
- Press the WPS button on your range extender for 2 to 5 seconds. Release the button.
- Press the WPS button on your router within two minutes after pressing WPS on extender.
- The system LED turns solid blue after a successful connection.
- Connect devices to the extender network.
- After the connection, you can move your extender.
- Place it halfway between dead zone and router to get better performance.
- Make sure your extender is within the range of your router’s network. Media playback feature is present in this extender.
When you got an issue with your extender then the reset of the extender may be the solution. Resetting of the extender will solve many issues related to your extender.
How to reset Asus extender to factory default settings?
- Before starting this reset process, please make sure there is no cable inserted such as audio cable or Ethernet cable.
- Otherwise, your extender will reboot rather than reset.
- Unplug all the cables, Plug the adapter and turn on the Extender.
- Locate the reset button and hold it with paper clip for 30 seconds.
- Paper clip is used because the hole for resetting is too small to press.
- Release the button.
If you got issues in the configuration of Asus extender then we have a team of experts. Tell us your problem, we will provide you a solution. Connect to the extender network after completing the reset process and access to 192.168.1.1 IP address or http://repeater.asus.com to open the configuration panel of the extender.
Troubleshoot Asus extender: Get solutions for Asus RP-N53 extender issues
Are you getting issues related to this extender? If yes then you have arrived at the correct place. Get a solution from us. Our team is working on these issues from last 4 years. So, you definitely get a solution from us. Chat live with us or make us a call. The issues may encounter such as not getting internet connection, not able to access web GUI of your extender, 5 GHz signal extender is not showing any status light, entered wrong password while having WEP security, touch controller is not working, web interface also called basic home page is not accessible, default web address or IP address is not working to get into the extender, how to change the password of extender network, how to change admin password, how to change wireless security type etc.
Asus Wi-Fi6 Repeater RP-AX56
The Asus RP-AX56 is a Wi-Fi 6 range extender, also known as a repeater, that is designed to help improve the coverage and signal strength of your Wi-Fi network. It works by receiving the Wi-Fi signal from your router and amplifying it, then sending the amplified signal to areas of your home or office where the original signal may be weak or inaccessible.
The RP-AX56 supports Wi-Fi 6 (802.11ax) technology, which offers faster speeds, lower latency, and increased capacity compared to previous generations of Wi-Fi. It also supports the 2.4 GHz and 5 GHz bands, so you can choose the best frequency for your device and application.
To use the RP-AX56, you will need to connect it to your router using an Ethernet cable and then place it in an area where it can receive a strong Wi-Fi signal. You can then use the RP-AX56’s web-based interface or a mobile app to configure and manage the device.
Overall, the Asus RP-AX56 can be a useful tool for improving the coverage and performance of your Wi-Fi network. It is especially useful if you have a large home or office with multiple floors or rooms, or if you have devices that are located far from your router.
Asus Wi-Fi6 Repeater RP-AX56 setup via repeater.asus.com
To set up the Asus RP-AX56 Wi-Fi 6 range extender via the repeater.asus.com web interface, follow these steps:
- Connect the RP-AX56 to your router using an Ethernet cable, and make sure that both the RP-AX56 and your router are powered on.
- Connect a device (such as a computer or smartphone) to the RP-AX56 using Wi-Fi or an Ethernet cable.
- Open a web browser on the connected device and enter “repeater.asus.com” in the address bar. This will open the RP-AX56’s web-based setup page.
- Follow the on-screen instructions to set up the RP-AX56 as a range extender. This may include selecting your Wi-Fi network, entering your Wi-Fi password, and choosing a location for the RP-AX56.
- Once the setup is complete, the RP-AX56 will begin amplifying and repeating the Wi-Fi signal from your router. You can use the web interface to manage the RP-AX56, including changing settings and checking the status of the device.
It’s important to note that the exact setup process may vary depending on the version of the RP-AX56 and the firmware it is running. If you encounter any issues during the setup process, you can try consulting the user manual or contacting Asus customer support for assistance.
ASUS Dual Band WiFi Repeater & Range Extender (RP-AC1900) Features, Setup and Login
The ASUS Dual Band WiFi Repeater & Range Extender (RP-AC1900) is a wireless range extender that is designed to improve the coverage and signal strength of your Wi-Fi network. It works by receiving the Wi-Fi signal from your router and amplifying it, then sending the amplified signal to areas of your home or office where the original signal may be weak or inaccessible.
Features:
- Supports dual-band Wi-Fi (2.4 GHz and 5 GHz) for fast and stable wireless connections
- Five Gigabit Ethernet ports for wired connections to devices such as smart TVs and gaming consoles
- AiRadar beamforming technology helps to improve the coverage and performance of the Wi-Fi signal
- Mobile app for easy setup and management of the range extender
- USB 3.0 port for sharing files and media over the network
To set up the ASUS Dual Band WiFi Repeater & Range Extender (RP-AC1900), follow these steps:
- Connect the range extender to your router using an Ethernet cable, and make sure that both the range extender and your router are powered on.
- Connect a device (such as a computer or smartphone) to the range extender using Wi-Fi or an Ethernet cable.
- Download the ASUS Router app from the App Store or Google Play Store, and launch it on the connected device.
- Follow the on-screen instructions to set up the range extender as a range extender. This may include selecting your Wi-Fi network, entering your Wi-Fi password, and choosing a location for the range extender.
- Once the setup is complete, the range extender will begin amplifying and repeating the Wi-Fi signal from your router. You can use the mobile app to manage the range extender, including changing settings and checking the status of the device.
To log in to the web-based interface of the ASUS Dual Band WiFi Repeater & Range Extender (RP-AC1900), follow these steps:
- Connect a device (such as a computer or smartphone) to the range extender using Wi-Fi or an Ethernet cable.
- Open a web browser on the connected device and enter the range extender’s IP address in the address bar. The default IP address for the range extender is typically “192.168.1.1” or “192.168.2.1”.
- Alternatively use www.repeater.asus.com or http://repeater.asus.com to access Asus Repeater GUI Page.
- Enter the default username and password for the range extender. The default login credentials may vary depending on the model and firmware version of the range extender. Some common default login credentials include:
- admin/admin
- admin/password
- user/user
- If you have changed the default login credentials, enter the new username and password that you set.
- Click “Log In” to access the range extender’s web-based interface i.e www.repeater.asus.com. From here, you can manage the range extender, including changing settings and checking the status of the device.
If you have forgotten the login credentials for your range extender, you may need to reset the device to its default settings to regain access. To do this, you will need to locate the reset button on the range extender and press it for a few seconds. This will reset the device to its default settings, including the default login credentials.